Widget Builder
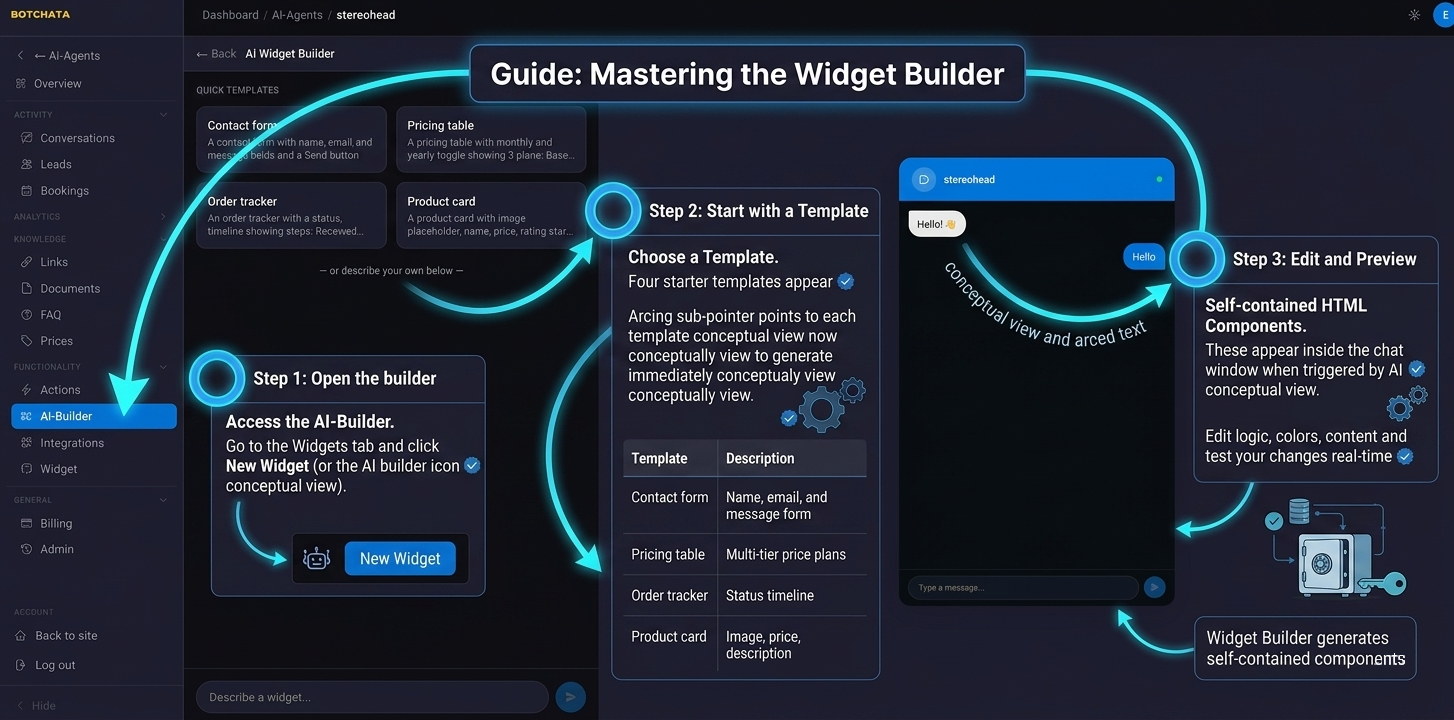
The Widget Builder generates self-contained HTML components — contact forms, feedback forms, pricing tables — that appear directly inside the chat window when triggered by the AI or opened from the widget menu.
A builder widget collects data (saved to your Submissions tab). It does not call shipping carriers or product catalogs — those come from Integrations, which return results as chat text or a product carousel.
Open the builder
Go to the Actions tab and switch to the AI-Builder sub-tab (also reachable from the AI-Builder quick link in the sidebar). Click New Widget.
Quick templates
Two starter templates appear at the top:
| Template | What it generates |
|---|---|
| Contact form | Name, email, message form with a Send button |
| Pricing table | A three-tier pricing display with a monthly/yearly toggle |
Click a template to generate it immediately, or skip them and describe your own below.
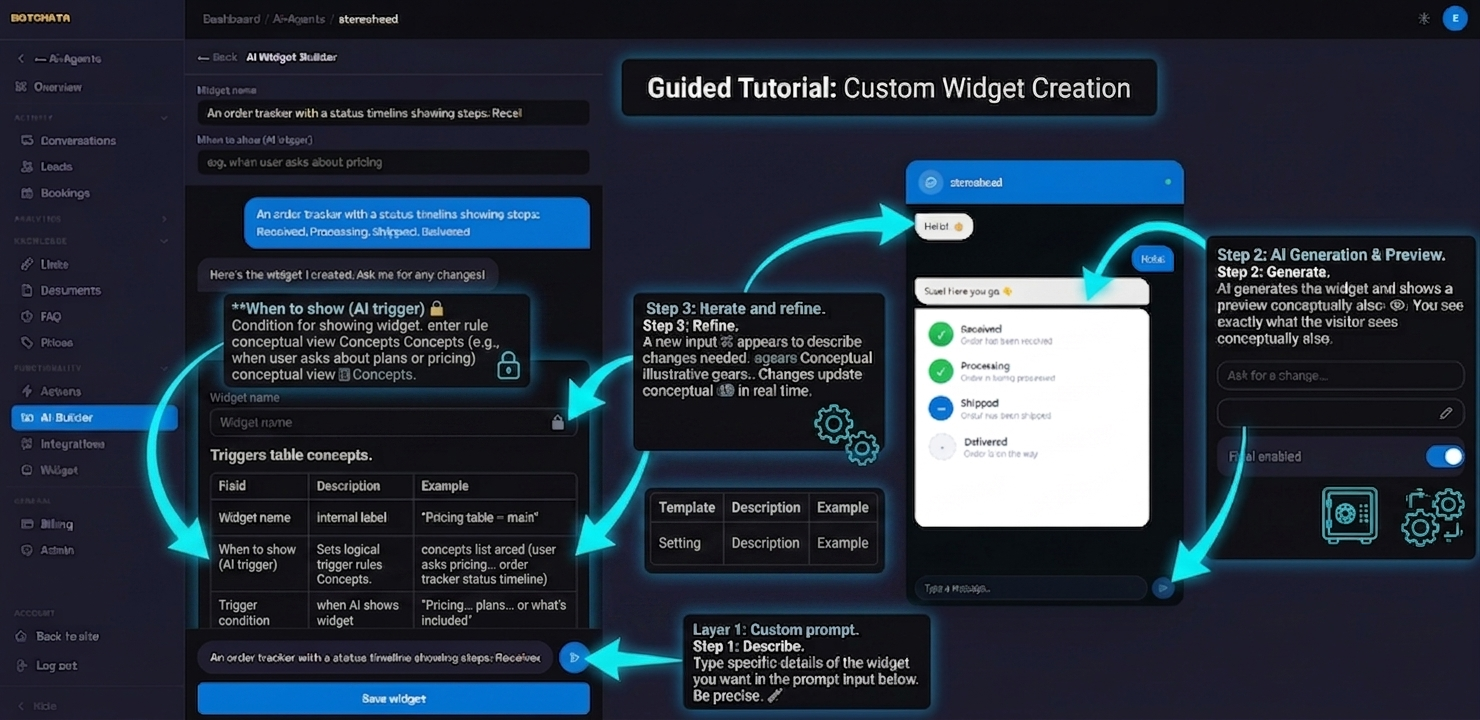
Custom prompt
Type a description of the widget you want in the prompt input. Be as specific as you like:
A feedback form with a 1-5 star rating, a text comment field, and a "Submit feedback" button.
Style it with a dark background and orange accents.
The AI generates the widget and shows a live preview inside a mock chat window, so you can see exactly how it will look to a visitor.
Iterate and refine
After generation, the "Ask for a change…" input appears below the preview. Describe what you want different:
Make the buttons rounded and increase the font size on the prices.
Add a note below the pricing table: "All prices exclude VAT."
Each iteration is a fresh AI generation and updates the preview.
Save the widget
Once satisfied, enter:
- Widget name — internal label (e.g. "Pricing table – main").
- Trigger condition — the plain-language condition for when the AI shows this widget.
- Show in widget menu — optionally also list this widget in the + launcher menu, so visitors can open it on demand (independent of AI triggering).
Show the pricing table when the visitor asks about plans, pricing, or what's included.
A widget can be AI-triggered, menu-listed, both, or neither — but it must be enabled to render. Click Save; the widget appears in the Actions overview as a card with a preview thumbnail.
Manage widgets
From the Actions overview you can:
- Toggle a widget on/off.
- Edit — reopens the builder with the existing HTML for further refinement.
- Delete — permanently removes the widget.
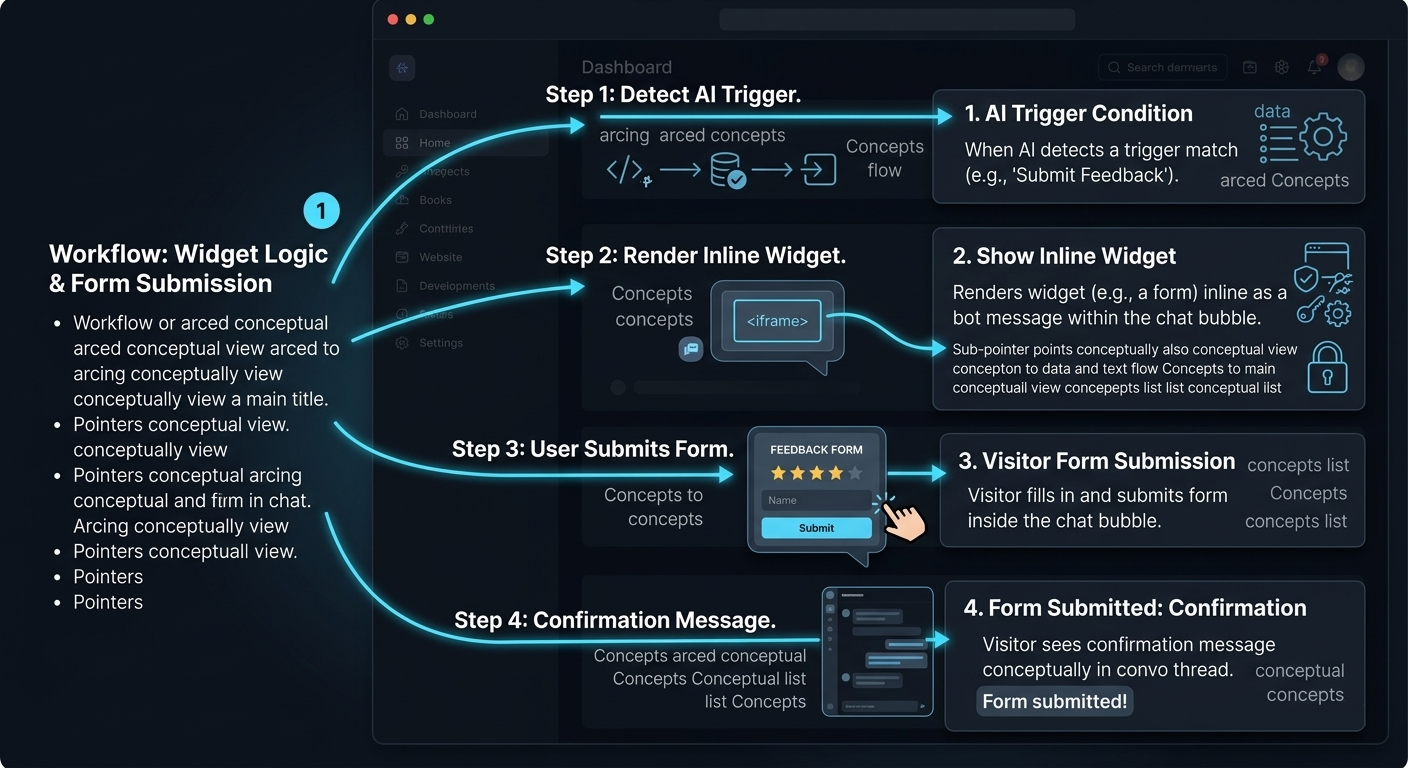
How widgets appear in chat
When the AI detects a trigger match (or the visitor opens the widget from the + menu), it renders inline as a bot message. The widget runs in a sandboxed <iframe> so it can't affect your page, and resizes to fit its content.
If the widget has a form, the visitor submits it from within the chat. After submitting, the form is replaced with a neutral "Submitted" confirmation, and the data is saved to your Submissions tab.
Tips
- Keep widgets focused on a single action — a pricing table that also has a contact form and a product carousel is overwhelming.
- Make trigger conditions specific to avoid the widget appearing in unrelated conversations.
- Generated widgets use inline CSS and vanilla JavaScript only — no external libraries or network requests.
- The render endpoint forces the widget to full width, so it fits whatever widget size you've set. If a layout still looks off, prompt: "Make the wrapper width:100% so it fills the container."