Quick Start
Get your AI chatbot live on your website in under 5 minutes — no coding required.
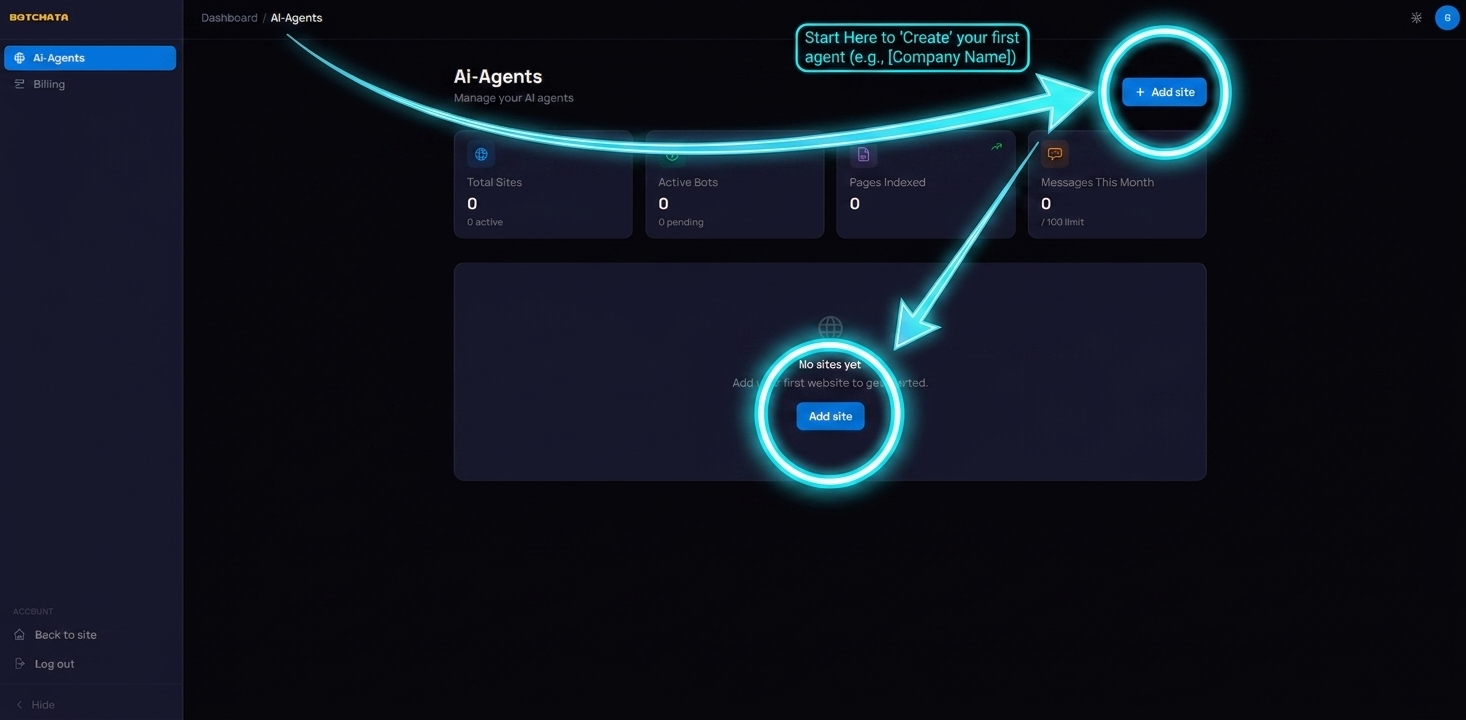
1. Create an AI Agent
After signing up, go to Dashboard → Ai-Agents and click New Agent. Give it a name (e.g., your company or website name) and click Create.
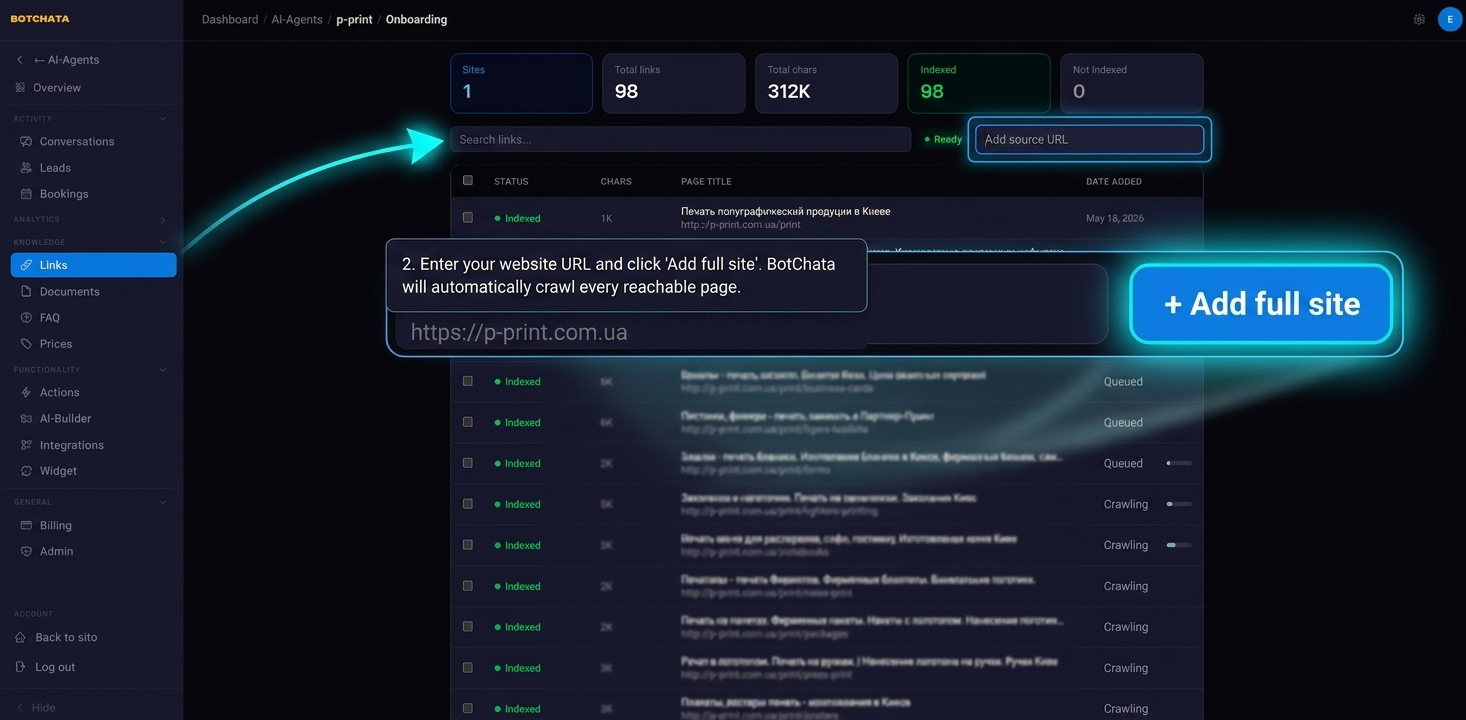
2. Index your website
On the agent detail page, open the Links tab. Enter your website URL in the Add source field and click Add full site. BotChata will crawl every page it can reach from that URL.
Indexing typically takes 1–3 minutes for a 50-page site. You can watch the progress in real time — the status badge will change from Indexing to Ready when done.
Tip: If your website has a sitemap at
/sitemap.xml, BotChata uses it automatically to discover pages faster.
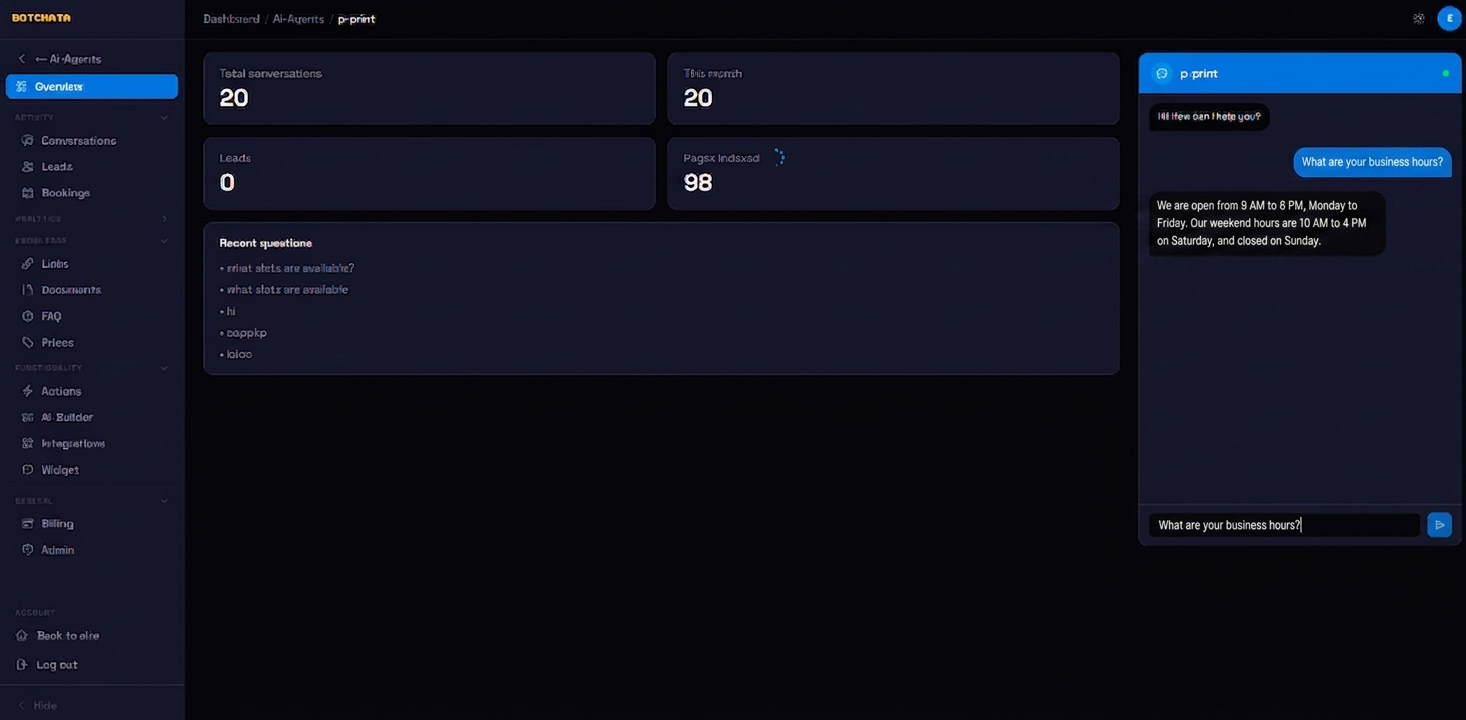
3. Test your chatbot
While indexing runs (or once it's done), open the Overview tab. The live chat widget on the right side lets you ask questions immediately using your site's content.
Try asking something a visitor would ask — for example, "What are your business hours?" or "How do I return a product?"
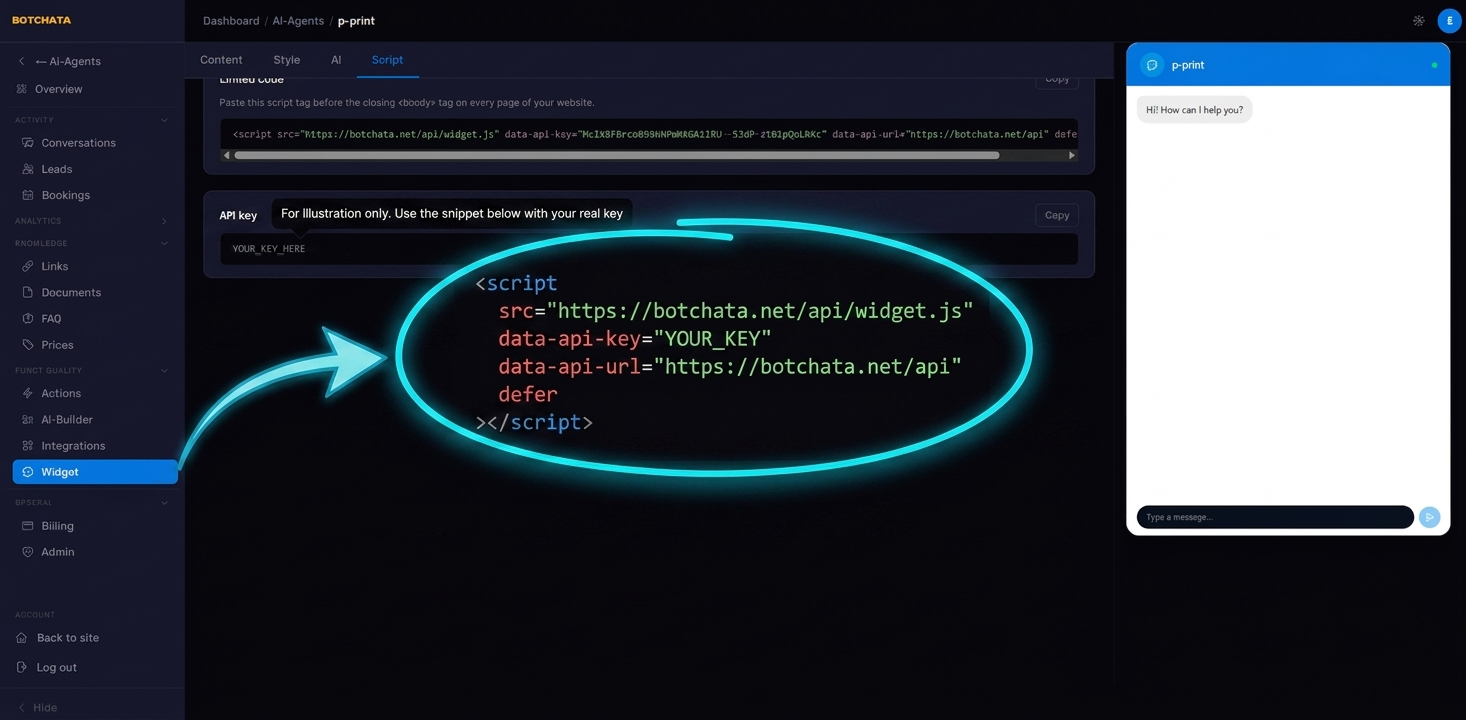
4. Copy the embed script
Go to the Widget → Script tab. Copy the snippet shown:
<script
  src="https://botchata.net/api/widget.js"
  data-api-key="YOUR_KEY"
  data-api-url="https://botchata.net/api"
  defer
></script>
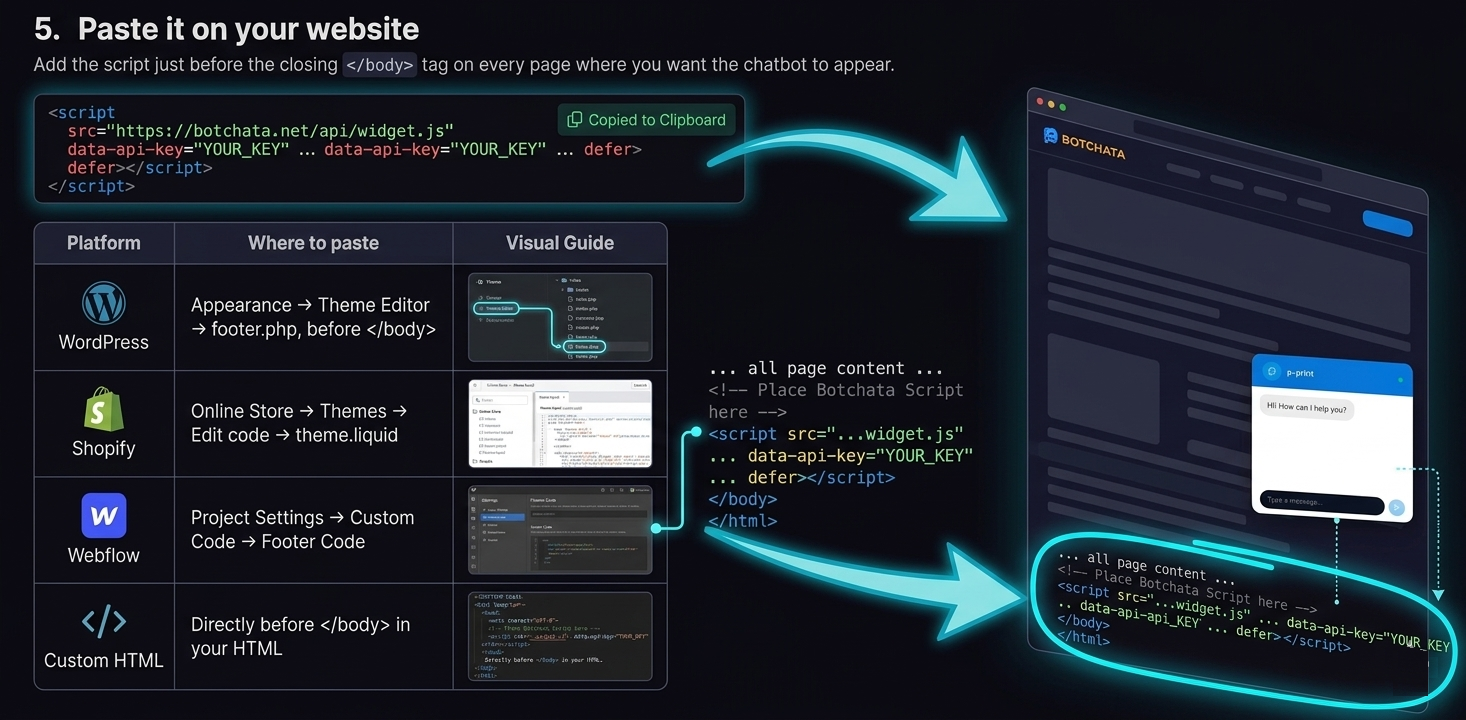
5. Paste it on your website
Add the script just before the closing </body> tag on every page where you want the chatbot to appear.
| Platform | Where to paste |
|---|---|
| WordPress | Appearance → Theme Editor → footer.php, before </body> |
| Shopify | Online Store → Themes → Edit code → theme.liquid |
| Webflow | Project Settings → Custom Code → Footer Code |
| Custom HTML | Directly before </body> in your HTML |
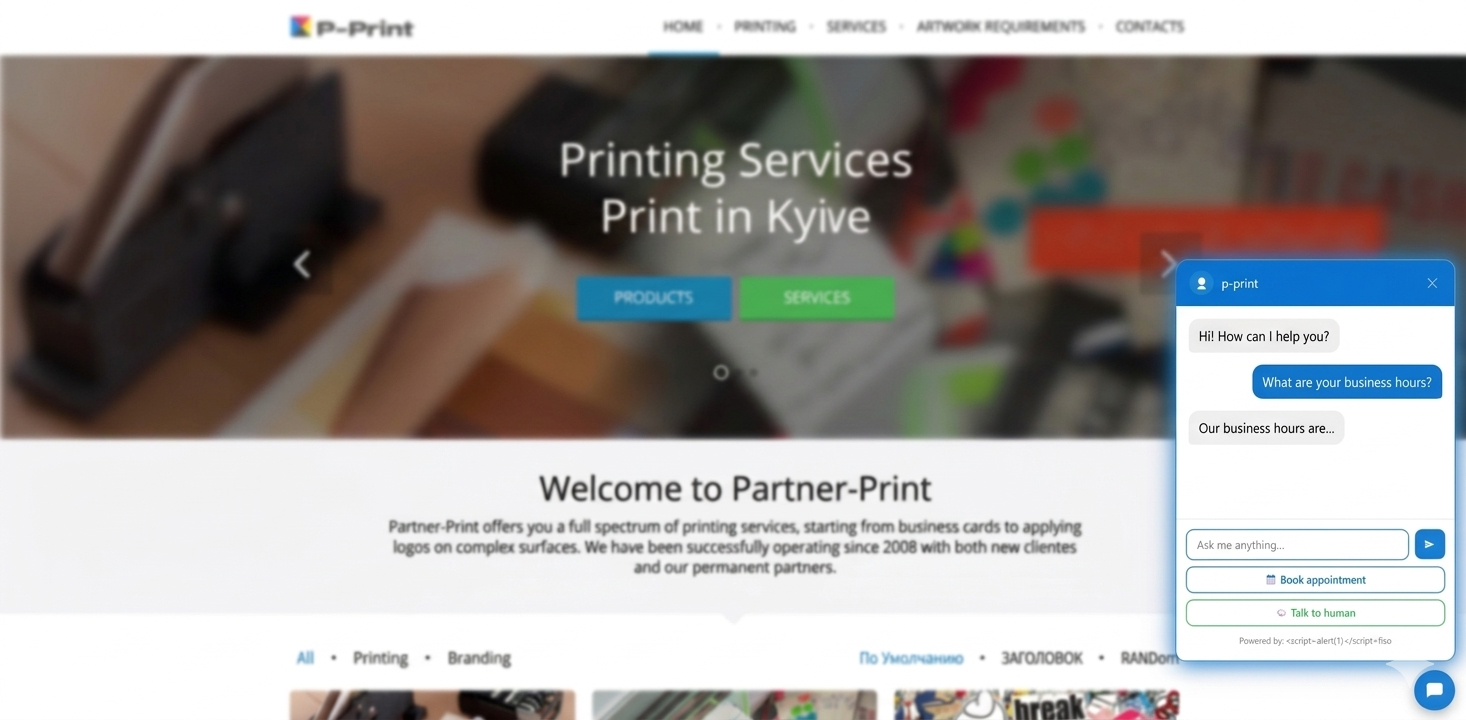
6. You're live
Reload your website — the chat bubble should appear in the bottom-right corner. Click it and start a conversation.
Didn't see the widget? Check that the script tag is present in the page source (
Ctrl+U) and thatdata-api-keyis not empty.
What's next
- Add more content sources — documents, FAQ, price lists
- Install on your website — platform guides & visitor identity
- Set the AI's behavior — role, tone, and persona
- Capture leads — collect visitor emails automatically
- Customize the widget — colors, avatar, greeting message