Lead Capture
Lead Capture shows a contact form inside the chat widget and saves submitted details to your Leads table.
Enable Lead Capture
Go to Capabilities → Collect Leads and toggle it on.
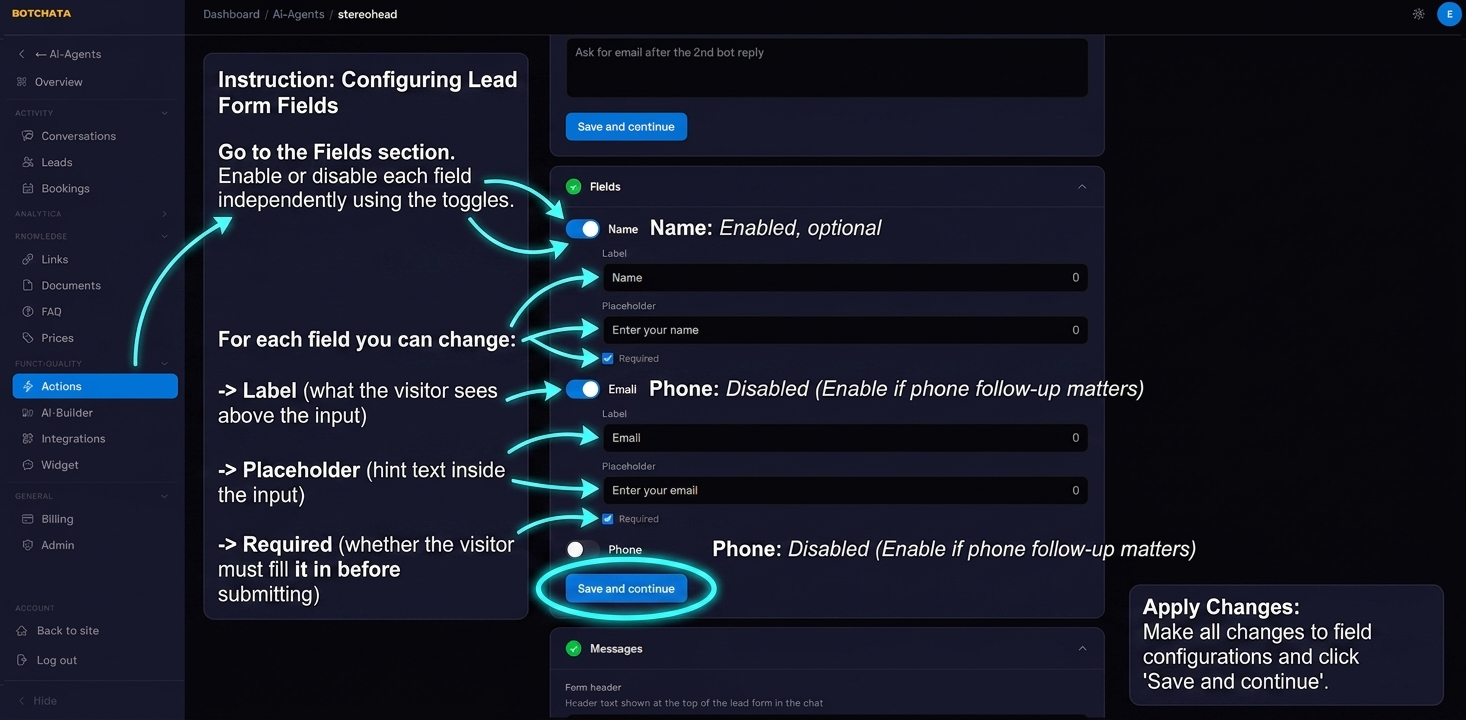
Configure the form fields
In the Fields section, you can enable or disable each field independently:
| Field | Default | Notes |
|---|---|---|
| Name | Enabled, optional | |
| Enabled, optional | ||
| Phone | Disabled | Enable if phone follow-up matters |
For each field you can change:
- Label — what the visitor sees above the input
- Placeholder — hint text inside the input
- Required — whether the visitor must fill it in before submitting
Set a trigger condition
AI trigger prompt (under General) tells the AI when to show the lead form. Leave it empty to never show the form automatically.
Write the condition in plain language — the AI reads this and decides after each message whether to trigger the form.
Good examples:
Show the form if the visitor asks about pricing, wants a demo, or asks to be contacted.
Show the form when the visitor expresses interest in buying or asks how to get started.
Bad example (too vague):
Show when visitor seems interested.
The form is shown at most once per conversation, regardless of how many times the condition is met.

Customize the messages
In the Messages section:
- Form header — shown above the form fields. Default: "Want to stay in touch? Leave your details."
- Success message — shown after successful submission.
- Dismiss message — shown on the button that closes the form without submitting.

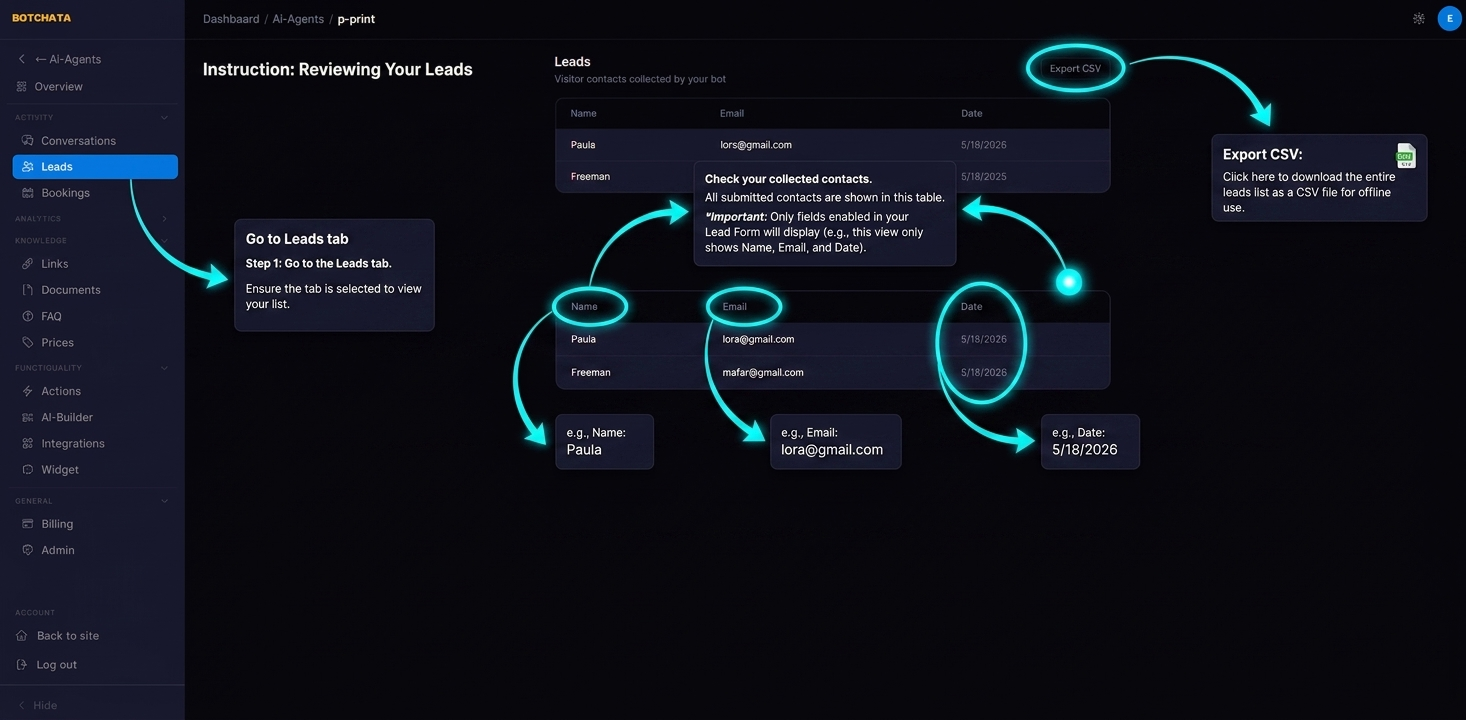
View collected leads
Go to the Leads tab. All submitted contacts appear in a table with name, email, phone, and the date collected. Use the Export CSV button to download the full list.
Tips
- Make at least one field required — empty submissions are useless.
- Keep the form header friendly and benefit-focused: "Get a personalized quote →" converts better than "Leave your details".
- Combine with Human Handoff: if the visitor fills the form, a manager can follow up via Telegram.