Booking
The Booking feature adds an appointment scheduling form to your chat widget. Submissions are saved to your Bookings table and optionally synced to Google Sheets and Google Calendar.
Enable Booking
Go to Capabilities → Booking and toggle it on. A booking entry appears in the widget's + launcher menu.
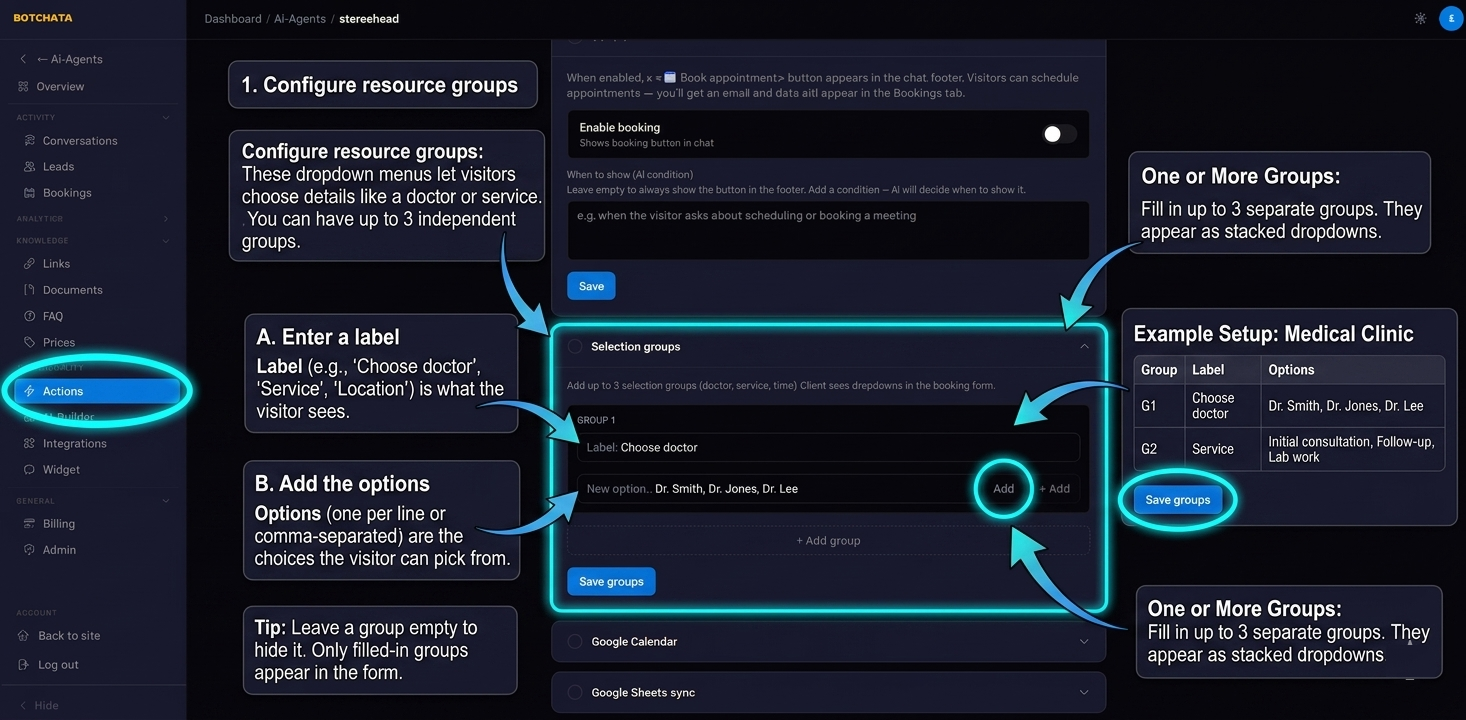
Configure resource groups
Resource groups are dropdown menus the visitor fills in when booking — for example, choosing a doctor, a service type, or a branch location. You can have up to 3 independent groups.
For each group:
- Enter a label (e.g. "Choose doctor", "Service", "Location").
- Add the options the visitor can pick from.
Example setup for a medical clinic:
| Group | Label | Options |
|---|---|---|
| 1 | Choose doctor | Dr. Smith, Dr. Jones, Dr. Lee |
| 2 | Service | Initial consultation, Follow-up, Lab work |
Leave a group empty to hide it.
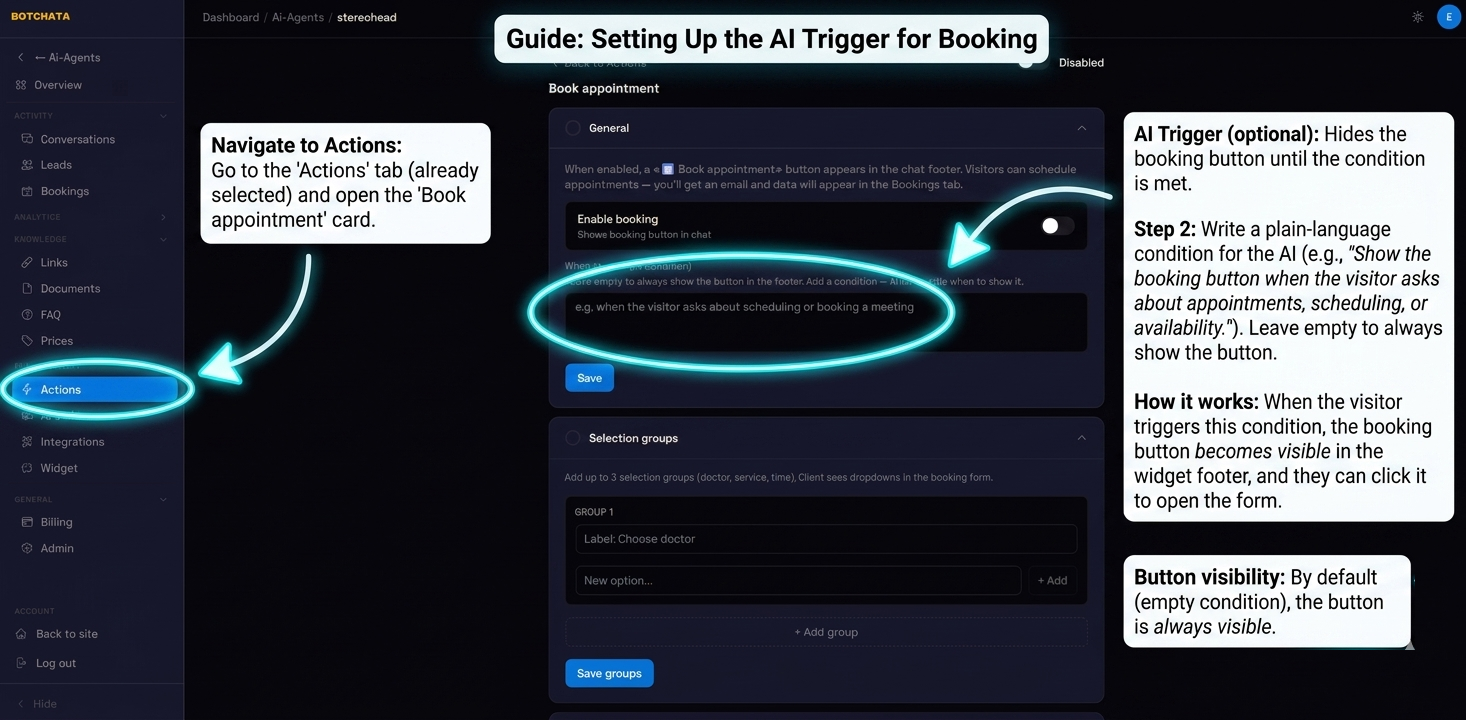
Trigger condition (optional)
By default the booking option is always available in the widget menu. To hide it until the AI decides to show it, fill in the AI trigger prompt:
Show booking when the visitor asks about appointments, scheduling, or availability.
When the trigger fires, the booking item is revealed.
Slot availability (avoid double-booking)
By default the visitor types any date and time. Turn on Schedule & availability to offer only real free slots instead.
In the Schedule & availability editor set:
- Timezone and weekly working hours.
- Slot length (e.g. 30 min) and buffer between appointments.
- Lead time (how far ahead the earliest slot can be) and max days ahead.
- Bookable resource — which resource group is the bookable specialist (so each doctor has their own calendar).
The widget then shows free-slot chips. A slot already taken is excluded, and if two visitors grab the same slot the second submission is rejected with a "slot taken" message.
Blocked time
To block out holidays, lunch breaks, or one-off unavailability, add entries under Blocks. A block removes that time from availability. A block without a resource blocks the whole business; a block tied to a resource only affects that specialist. Blocks never appear in your bookings list or analytics.
Booking provider: native or Cal.com
Most owners use the built-in (native) scheduler described above. If you already run your calendar in Cal.com, switch the provider to Cal.com (requires the Cal.com integration with an API key). Availability and new bookings then proxy to your Cal.com account, while a local copy is still mirrored to your Bookings table. The widget experience is identical.
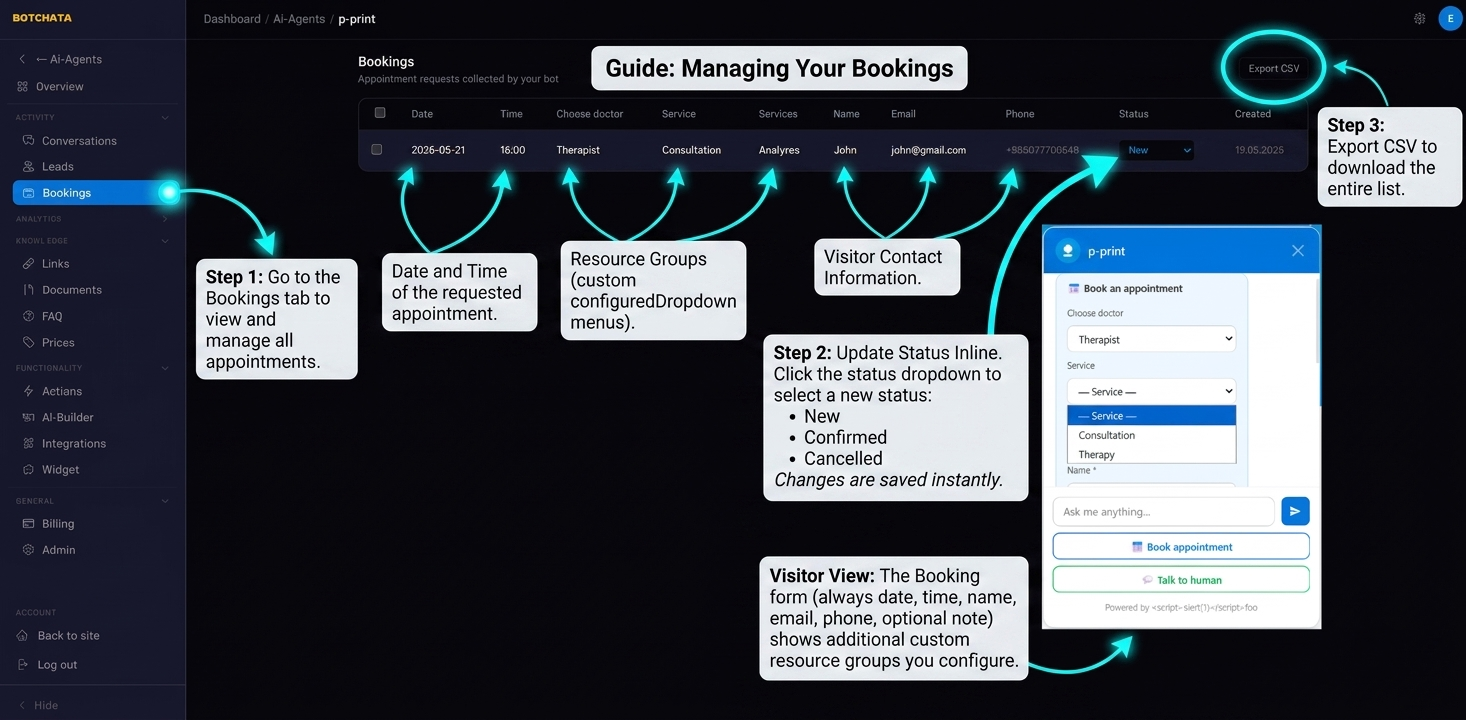
View and manage bookings
Go to the Bookings tab. Each row shows date and time, one column per resource group, the visitor's contact details, and a status (New / Confirmed / Cancelled). Click the status dropdown to update it inline. Use Export CSV to download all bookings.
Connect Google Sheets (optional)
Every new booking can be appended as a row to a Google Sheet.
- In Capabilities → Booking → Google Sheets, click Connect Google Account and complete the OAuth flow.
- Create or open a spreadsheet and copy its Sheet ID from the URL:
https://docs.google.com/spreadsheets/d/SHEET_ID_HERE/edit - Paste the Sheet ID and click Save.
New bookings are appended automatically from then on; existing bookings are not back-filled.
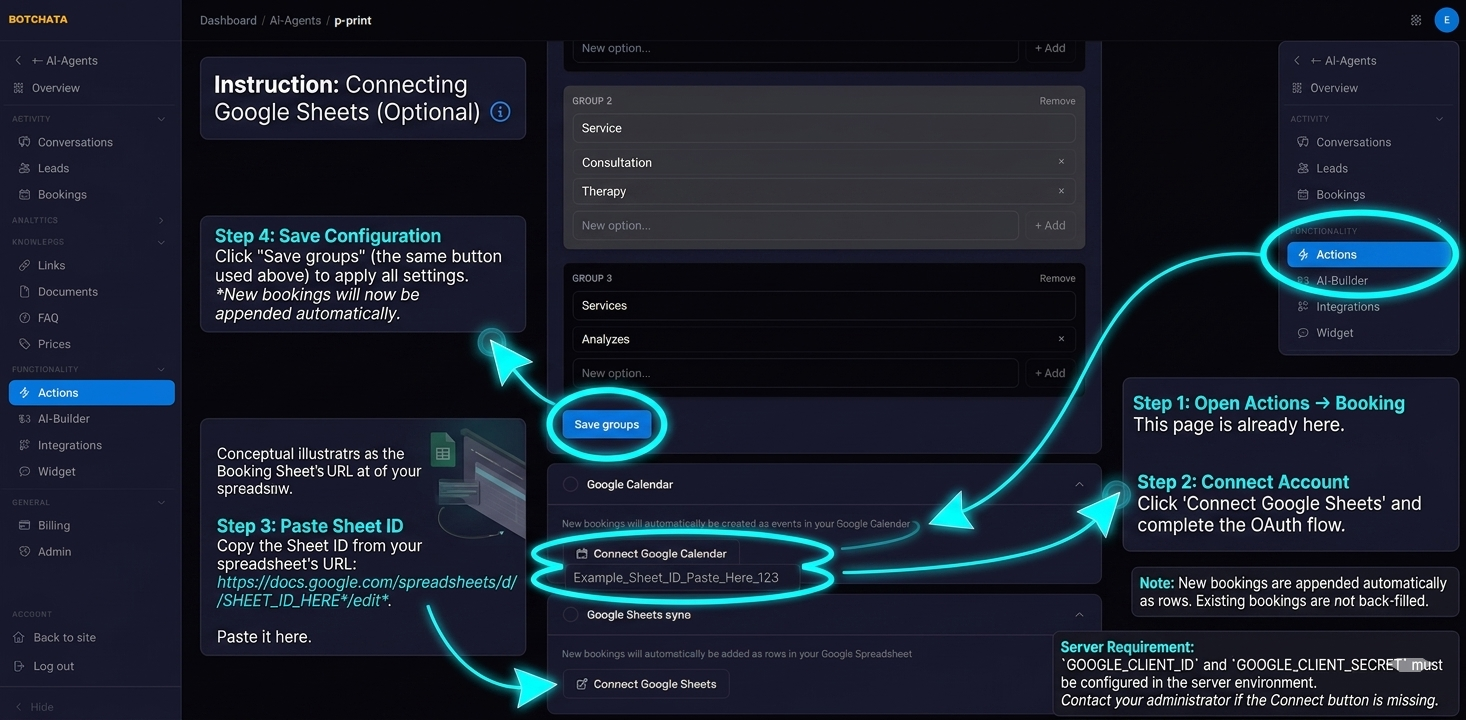
Connect Google Calendar (optional)
Connect a Google Calendar so each booking creates a calendar event (and so native availability can read your existing events to avoid clashes). Click Connect Google Calendar in the booking settings and complete the OAuth flow. Events are tagged per-resource, so availability can tell specialists apart even on a shared calendar.
Required:
GOOGLE_CLIENT_IDandGOOGLE_CLIENT_SECRETmust be configured in the server environment. Contact your administrator if the Connect button is missing.