Custom Forms
Custom Forms let you collect any structured data from visitors — order details, support requests, survey responses — triggered automatically by the AI based on conversation context, or opened on demand from the widget menu.
Create a form
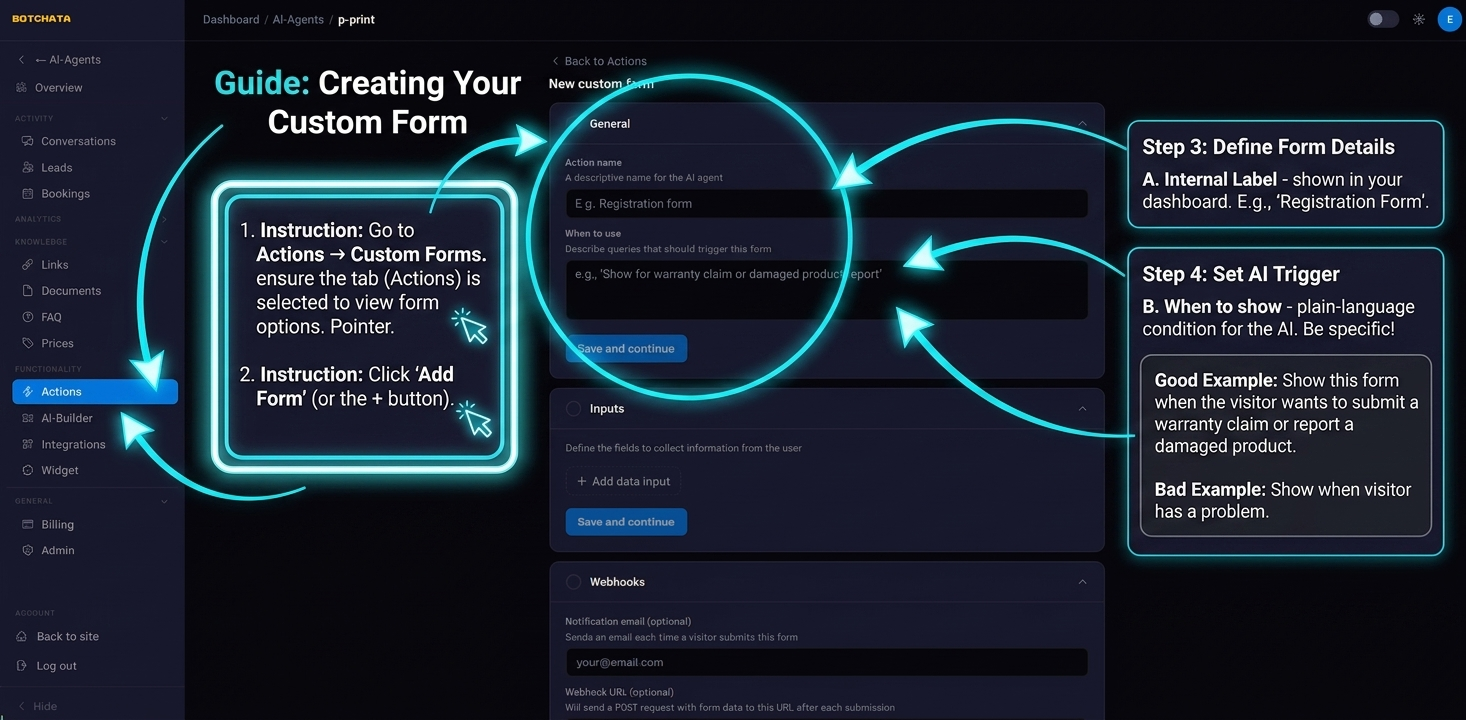
Go to Capabilities → Custom Forms and click Add Form (or the + button).
Name and trigger description
- Name — internal label shown in your dashboard.
- When to show — plain-language description that tells the AI when to display this form. Be specific.
Good example:
Show this form when the visitor wants to submit a warranty claim or report a damaged product.
Bad example:
Show when visitor has a problem.
Add fields
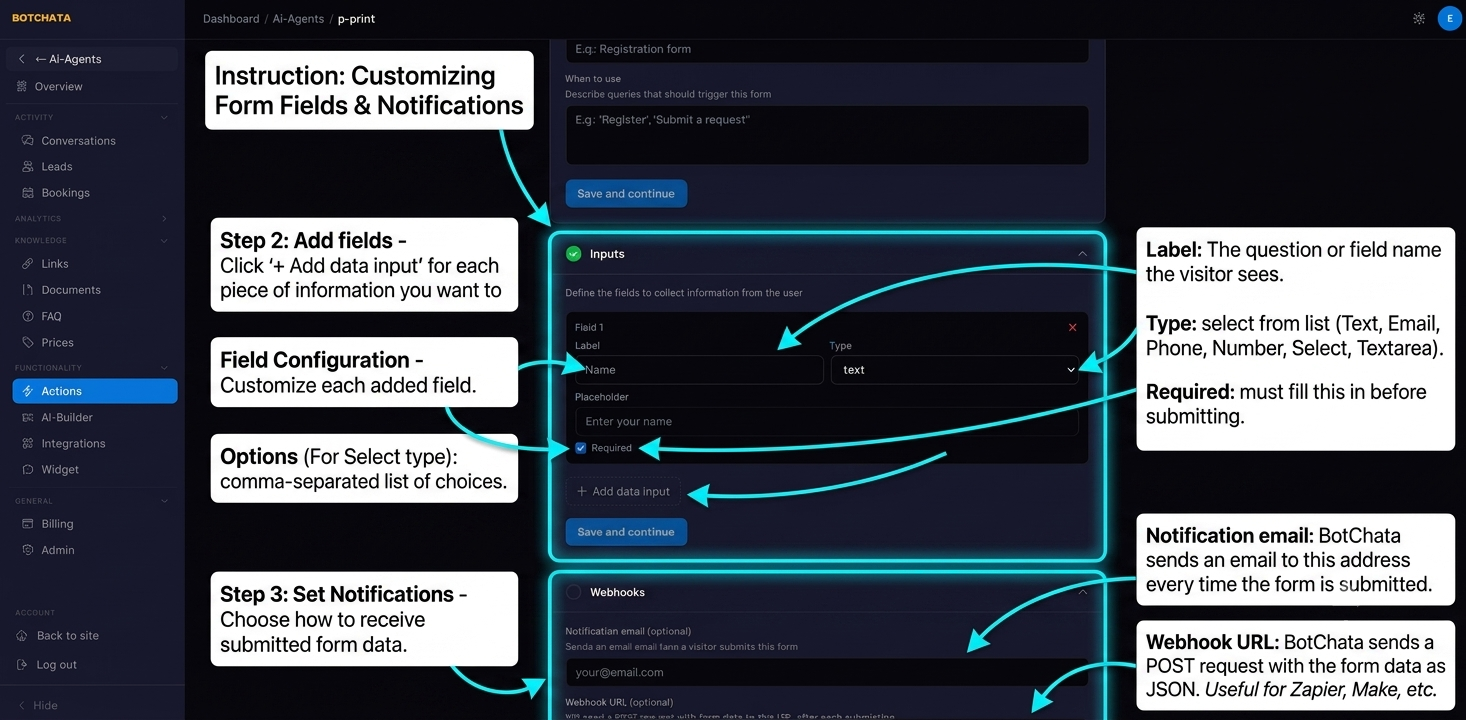
Click Add field for each piece of information you want to collect. For each field:
| Setting | Description |
|---|---|
| Label | The question or field name the visitor sees |
| Type | Text, Email, Phone, Number, Select, Textarea, File |
| Required | Whether the visitor must fill this in |
| Options | For Select type: the list of choices the visitor picks from |
File fields let the visitor attach a photo or document (up to 10 MB). The file is emailed to you as an attachment — it is never stored as a download link.
Notifications
- Notification email — BotChata sends an email to this address every time the form is submitted (with any uploaded files attached).
- Webhook URL — BotChata sends a
POSTrequest with the form data as JSON to this URL on every submission. Useful for integrating with Zapier, Make, or your own backend.
Show the form
A form can appear in two ways — turn on either or both:
- Enabled (AI-triggered) — the AI shows the form when the conversation matches your when to show description.
- Show in widget menu — the form is listed in the + launcher menu so visitors can open it any time, even if it's not AI-triggered.
How it works in chat
When triggered, the form is displayed inline in the chat. The visitor fills it in and submits; a confirmation appears, and you receive a notification if configured. Every submission is also saved to the Submissions tab where you can review and export them.
Tips
- Use Select fields to constrain choices and make data easier to process.
- Set Required only on fields you truly need — every extra required field reduces completion rates.
- Test your form using the live preview in Overview before enabling it in production.
- A custom form can also act as a pre-handoff form — collecting details before connecting the visitor to a human.